Doces e Sobremesas
How to Bake the Perfect Naked Cake: A Step-by-Step Guide

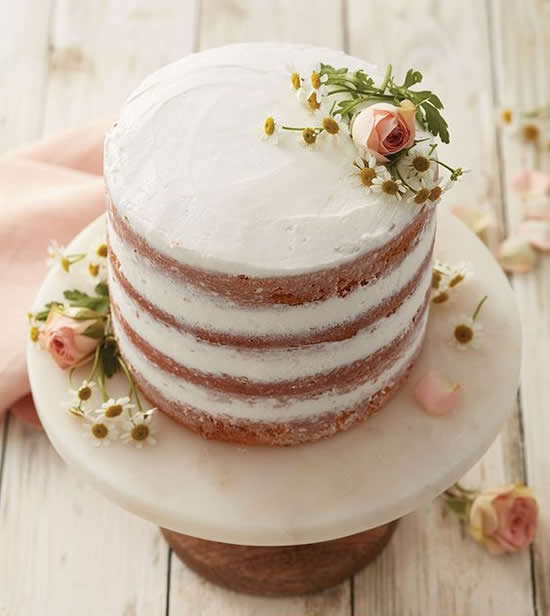
The naked cake has gained popularity in recent years as an elegant alternative to traditionally frosted cakes.
This cake style allows the inner layers and fillings to shine through, creating a rustic yet sophisticated presentation.
If you want to learn the art of making the perfect naked cake, you’ve come to the right place.
In this article, we will guide you through a step-by-step process to create a delicious and visually stunning dessert that will impress on any occasion.
Do not forget to take a look at the recipies in the end of the article I suggest you should try!!
1. Ingredients and Necessary Tools
Before you begin, it’s important to gather all the necessary ingredients and tools. You will need:
Ingredients:
- 2 to 3 cake layers (flavor of your choice)
- Filling (e.g., buttercream, ganache, or whipped cream)
- Fresh fruits or other decorative elements
- Confectioners’ sugar (for dusting)
Tools:
- Cake spatulas (one large and one small)
- Cake stand or plate
- Parchment paper
- Piping bag (optional)
- Piping tips (optional)
- A good set of kitchen knives
- Rolling pin (for leveling the cake layers)
2. Preparing the Cake Layers
The first step in making the perfect naked cake is baking your cake layers. You can use any flavor you prefer, such as vanilla, chocolate, strawberry, or even a combination of flavors. Make sure the layers are completely cooled before proceeding.
Use a rolling pin to level the cake layers, ensuring they have the same height. This will help the cake stay even and look more professional when assembled.
3. Assembling the Cake
Now comes the fun part: assembling the naked cake. Follow these steps:
Step 1: Prepare the Base
Place a piece of parchment paper on the cake stand or plate. This will make cleanup easier and prevent the cake from sticking to the stand.
Step 2: First Layer
Place the first cake layer in the center of the stand. Use a bit of filling to secure the layer in place.
Step 3: Add the Filling
Spread a generous layer of filling over the first cake layer. You can use buttercream, chocolate ganache, whipped cream, or any filling of your choice.
Step 4: Add the Remaining Layers
Add the remaining cake layers, adding filling between each one. Make sure the layers are aligned and level.
4. Covering the Sides
Now, let’s cover the sides of the cake so that it appears “naked,” revealing the inner layers. Here are the steps:
Step 1: Spread a Thin Layer of Filling
Use a large spatula to spread a thin layer of filling on the sides of the cake. This will serve as “glue” for the decorative elements.
Step 2: Decoration with Fresh Fruits
Decorate the sides of the cake with fresh fruits, such as strawberries, raspberries, or kiwi slices. The variety of colors and textures will add an elegant touch to your cake.
Step 3: Finish with Confectioners’ Sugar
Gently dust confectioners’ sugar over the top of the cake for a final touch and a rustic appearance.
5. Decorating the Top
Decorating the top of the cake is the final step in creating the perfect naked cake. Here are some creative options:
Fruits and Herbs
Add fresh fruits like blueberries, strawberries, or grapes to the center of the cake. You can also include some mint or rosemary leaves for a touch of freshness.
Edible Flowers
Edible flowers such as violets or roses are a lovely choice for cake decoration. Make sure the flowers are edible and free from chemicals.
Whipped Cream and Piping Tips
If you desire a more elaborate finish, use whipped cream and piping tips to create beautiful patterns on the top of the cake.
6. Tips for Success
Skill Level: Be aware that making a naked cake requires a certain level of kitchen skill, especially when it comes to leveling the layers and spreading the filling evenly.
Preparation Time: Allocate enough time for preparation. It’s important not to rush to ensure your naked cake comes out perfect.
Storage: Naked cakes are best consumed on the same day or the day after to maintain their texture and freshness.
Sponge Cake for Beginners: A Simple and Delicious Recipe
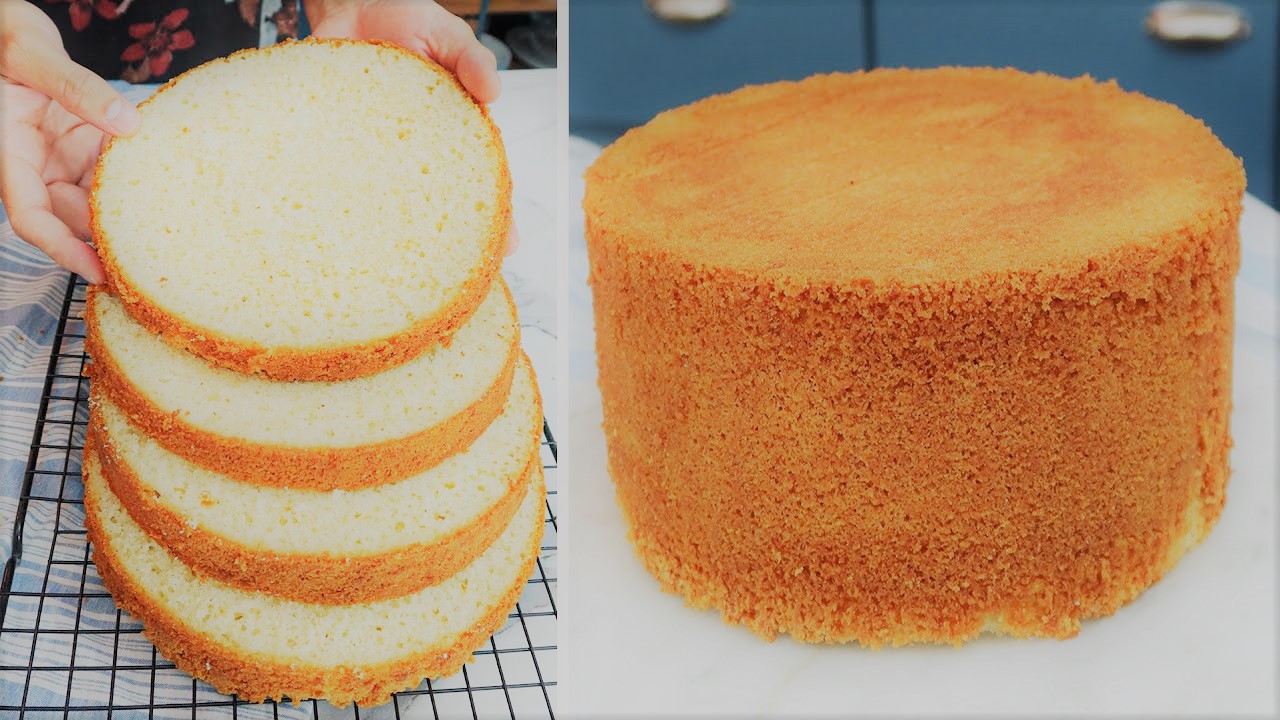
Sponge cake is a highly versatile and widely used type of cake in the world of baking. It is known for its light and fluffy texture, making it perfect as a base for various desserts, such as filled cakes and tarts.
If you’re a beginner in the art of baking, don’t worry; this sponge cake recipe is straightforward and ideal for starting out. Let’s learn how to make a delicious and soft sponge cake.
Ingredients:
- 4 eggs
- 1 cup of sugar
- 1 cup of all-purpose flour
- 1 teaspoon of baking powder
- A pinch of salt
- 1 teaspoon of vanilla extract (optional)
- Butter and flour for greasing the pan
Step-by-Step Instructions:
1. Preheat the Oven:
Preheat the oven to 180°C (350°F). While the oven is heating up, prepare the baking pan. Grease a 20 cm (8-inch) diameter cake pan with butter and dust it with flour to prevent the cake from sticking.
2. Prepare the Ingredients:
Separate the eggs into egg whites and egg yolks. Place the egg whites in a large bowl and the egg yolks in another. Make sure there are no traces of yolk in the bowl with the egg whites, as this can affect their ability to beat into stiff peaks.
3. Beat the Egg Whites:
Using an electric mixer or a hand whisk, beat the egg whites until they form stiff peaks. Add a pinch of salt to help stabilize the egg whites. They should become glossy and hold their shape when you lift the beaters.
4. Add the Sugar:
While still beating the egg whites, gradually add half of the sugar (half a cup). Continue beating until the egg whites are shiny and voluminous.
5. Incorporate the Egg Yolks:
With the beaten egg whites ready, add the egg yolks one at a time, beating well after each addition. If you’re using vanilla extract, add it at this stage.
6. Fold in the Flour and Baking Powder:
Sift the all-purpose flour and baking powder over the egg mixture. Use a silicone spatula or a wooden spoon to gently fold the dry ingredients into the batter, using gentle, upward strokes. Ensure that the batter is well combined but avoid overmixing to retain the airiness from the beaten egg whites.
7. Bake the Sponge Cake:
Pour the batter into the prepared pan and smooth the top with a spatula. Bake in the preheated oven for approximately 25-30 minutes or until the sponge cake is golden and a toothpick inserted into the center comes out clean.
8. Cool and Unmold:
Remove the sponge cake from the oven and let it cool in the pan for a few minutes. Then, run a knife around the edges to loosen it and carefully invert it onto a wire rack to cool completely.
Extra Tips:
- You can enhance the flavor of the sponge cake by adding lemon or orange zest to the batter.
- For an even fluffier sponge cake, sift the flour and baking powder twice before incorporating them into the batter.
- Remember not to open the oven door during baking to prevent the cake from deflating.
Now that you’ve mastered this basic sponge cake recipe, you can use it as a canvas to create various delightful desserts.
Try filling it with cream, fruits, or chocolate ganache, and you’ll have an amazing cake to enjoy with friends and family.
Have fun exploring the world of baking and experimenting with your own variations of this classic sponge cake!
Cobertura/Recheio de banana para bolo: clara, super firme e saudável
Coconut Filling
Here’s a recipe for a firm coconut filling perfect for a naked cake. This coconut filling will add flavor and texture to your dessert without overshadowing the cake layers. Let’s get started:
Ingredients:
- 1 can of sweetened condensed milk
- 1 can of coconut milk (use the same measure as the can of sweetened condensed milk)
- 1 cup of shredded coconut (can be fresh or desiccated coconut)
- 4 egg yolks
- 2 tablespoons of cornstarch (cornflour)
- A pinch of salt
Instructions:
In a bowl, mix the sweetened condensed milk, coconut milk, and shredded coconut. Set this mixture aside.
In another bowl, lightly beat the egg yolks with a fork or a whisk.
In a medium-sized saucepan, add the mixture of sweetened condensed milk and coconut and place it over medium heat. Let it heat up until it starts to simmer, stirring occasionally to prevent the coconut from sticking to the bottom of the pan.
When the mixture is hot, slowly add the beaten egg yolks while continuing to stir vigorously to prevent the yolks from cooking instantly.
In a separate cup, dissolve the two tablespoons of cornstarch in a little cold water to make a paste. Make sure the cornstarch is completely dissolved and doesn’t form lumps.
Add the cornstarch paste to the coconut mixture and continue stirring. You will see the filling start to thicken as it cooks.
Keep cooking and stirring until the filling reaches a firm consistency, similar to that of pastry cream. This usually takes about 5 to 7 minutes after adding the cornstarch.
Once you achieve the desired consistency, remove the coconut filling from the heat and let it cool completely.
When the coconut filling is completely cool, you can use it to fill your naked cake. Place a layer of the filling between the cake layers, spreading it evenly. Continue stacking the layers and filling as desired.
This firm coconut filling will add a tropical touch to your naked cake, providing a perfect balance of sweetness and texture. Enjoy your cake and the reactions of your guests when they discover the delicious flavor of this coconut filling!
Conclusion:
Making the perfect naked cake requires patience, practice, and creativity. But it doesn’t need to be difficult!
With the right ingredients, proper tools, and a dash of love, you can create a dessert that will not only delight the taste buds but also visually impress.
Remember that the beauty of a naked cake lies in its simplicity, so don’t worry if it doesn’t look perfectly polished.
The rustic charm is part of its appeal. Now, it’s time to step into the kitchen and start baking your own amazing naked cake. Enjoy!
Bolo dos anjos: macio como uma nuvem e super simples de preparar
Quer receber essas e outras receitas no seu WhatsApp CLIQUE AQUI e se junte ao nosso grupo de receitas.
-

 Corpo e Mente11 meses atrás
AVC – 7 Sinais e Sintomas de Alerta e Como Prevenir
-
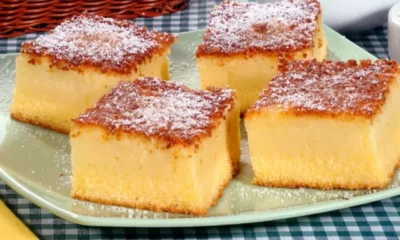
 Doces e Sobremesas1 ano atrás
Bolo de Fubá Cremoso – receita secreta
-

 Beleza10 meses atrás
Receita de Misturinha para Cabelo Crescer Rápido e Parar de Cair
-

 Beleza1 ano atrás
Descubra o poder do caroço de abacate no cabelo
-

 Bebidas11 meses atrás
Chá para Limpar a Gordura do Fígado – Receita Natural e Deliciosa
-

 Doces e Sobremesas1 ano atrás
Bolo Cremoso de Leite Condensado super simples
-

 Corpo e Mente11 meses atrás
Como Acabar com a Infecção Urinária – Remédio Caseiro Poderoso
-

 Massas2 anos atrás
Pão de água: sem ovos, sem leite, sem sovar